In This Article
Updating an Existing Saved Filter
Overview
The Saved Filters feature allows you to save your frequently used filter combinations and quickly reapply them whenever you need them, eliminating the need to manually reconfigure filters each time you visit a page. Previously, this functionality was only available on the Ideas list. Now, Saved Filters has been extended across the entire WiredUp platform to provide a consistent filtering experience wherever you work. You can now save, manage, and reuse filter configurations on:
- Initiatives/Ideas
- KPIs
- Value Hound
- Meetings
- RARs
- Reports
- Administration
Each saved filter is private to you—other users cannot see or access your saved filters—and filters are scoped to the specific page or module where they were created. This means a filter saved on the KPI List will only appear when you're viewing the KPI List, ensuring your saved filters remain organized and relevant to each context.
The Saved Filters interface appears at the top of every filter panel, giving you quick access to save new filters, apply existing ones, update them as your needs change, rename them for clarity, or delete filters you no longer use.
Creating a Saved Filter
To create a new saved filter:
- Click the Filter icon to open the Filter drawer

- Configure your desired filters (Status, Portfolio, Owner, Stage, etc.)
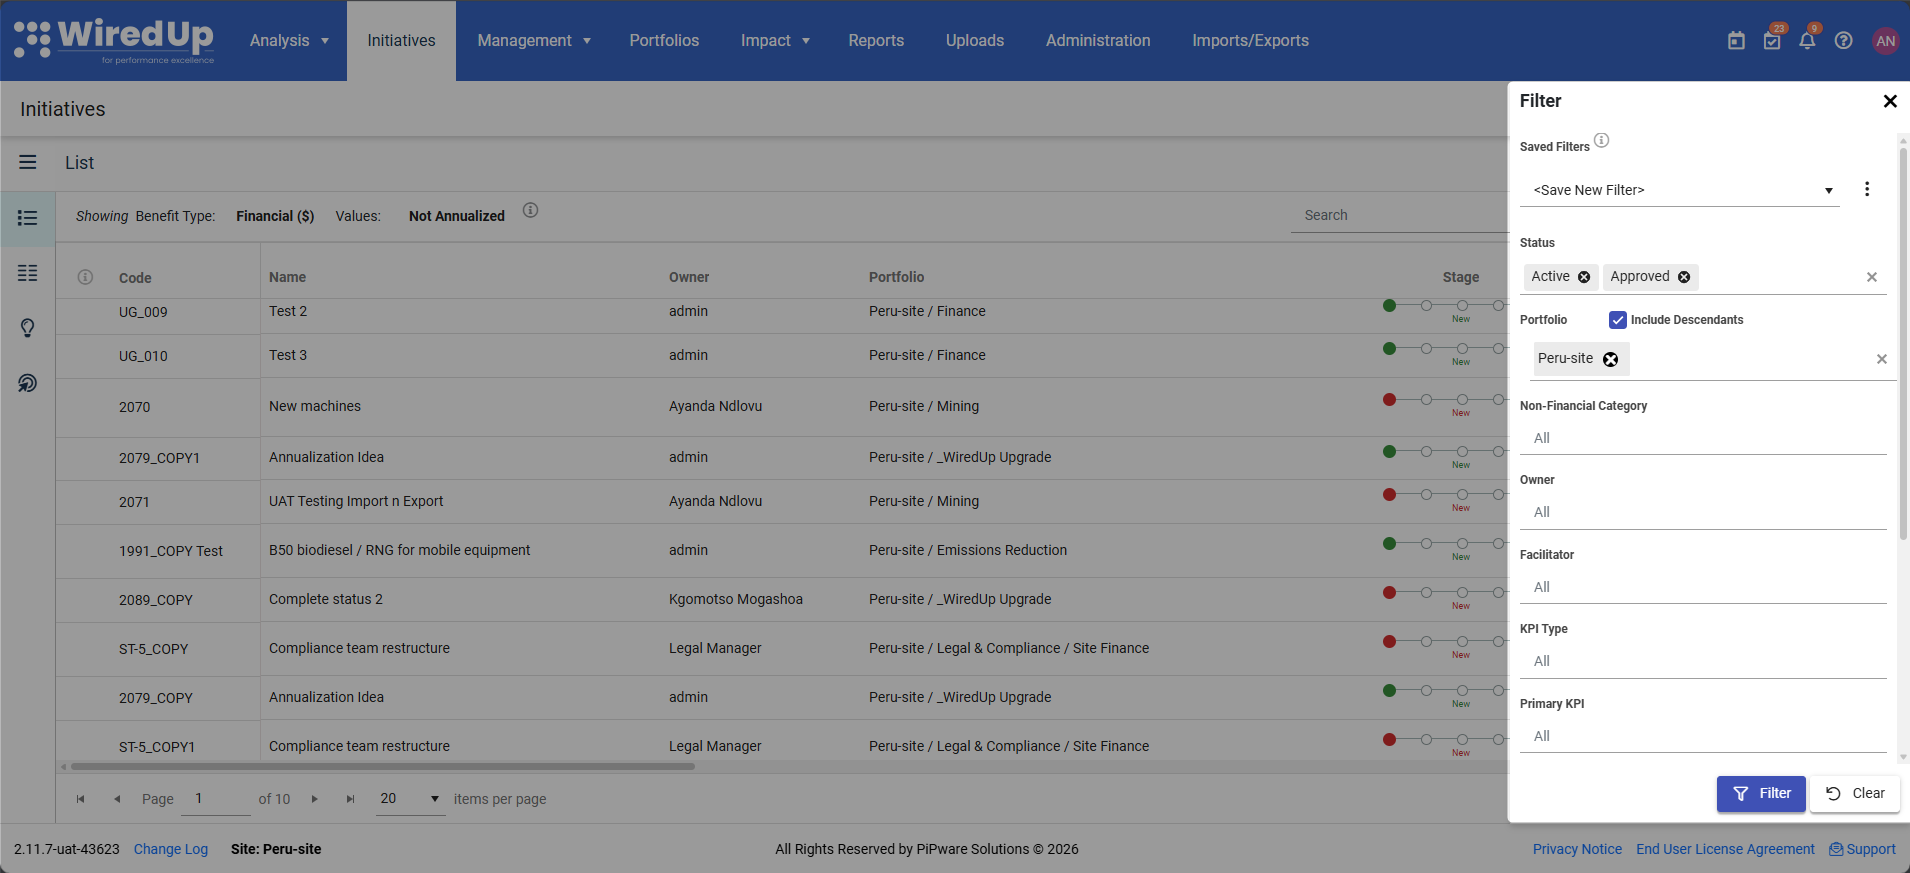
- The Saved Filters dropdown at the top displays <Save New Filter> by default
- Click the Save button from the vertical ellipse menu to save the filters

- A "Save Filter" dialog appears requesting a filter name. Enter a descriptive name for your filter and click Save or Save & Filter to apply the filter immediately

- The new saved filter becomes selected in the dropdown list of saved filters

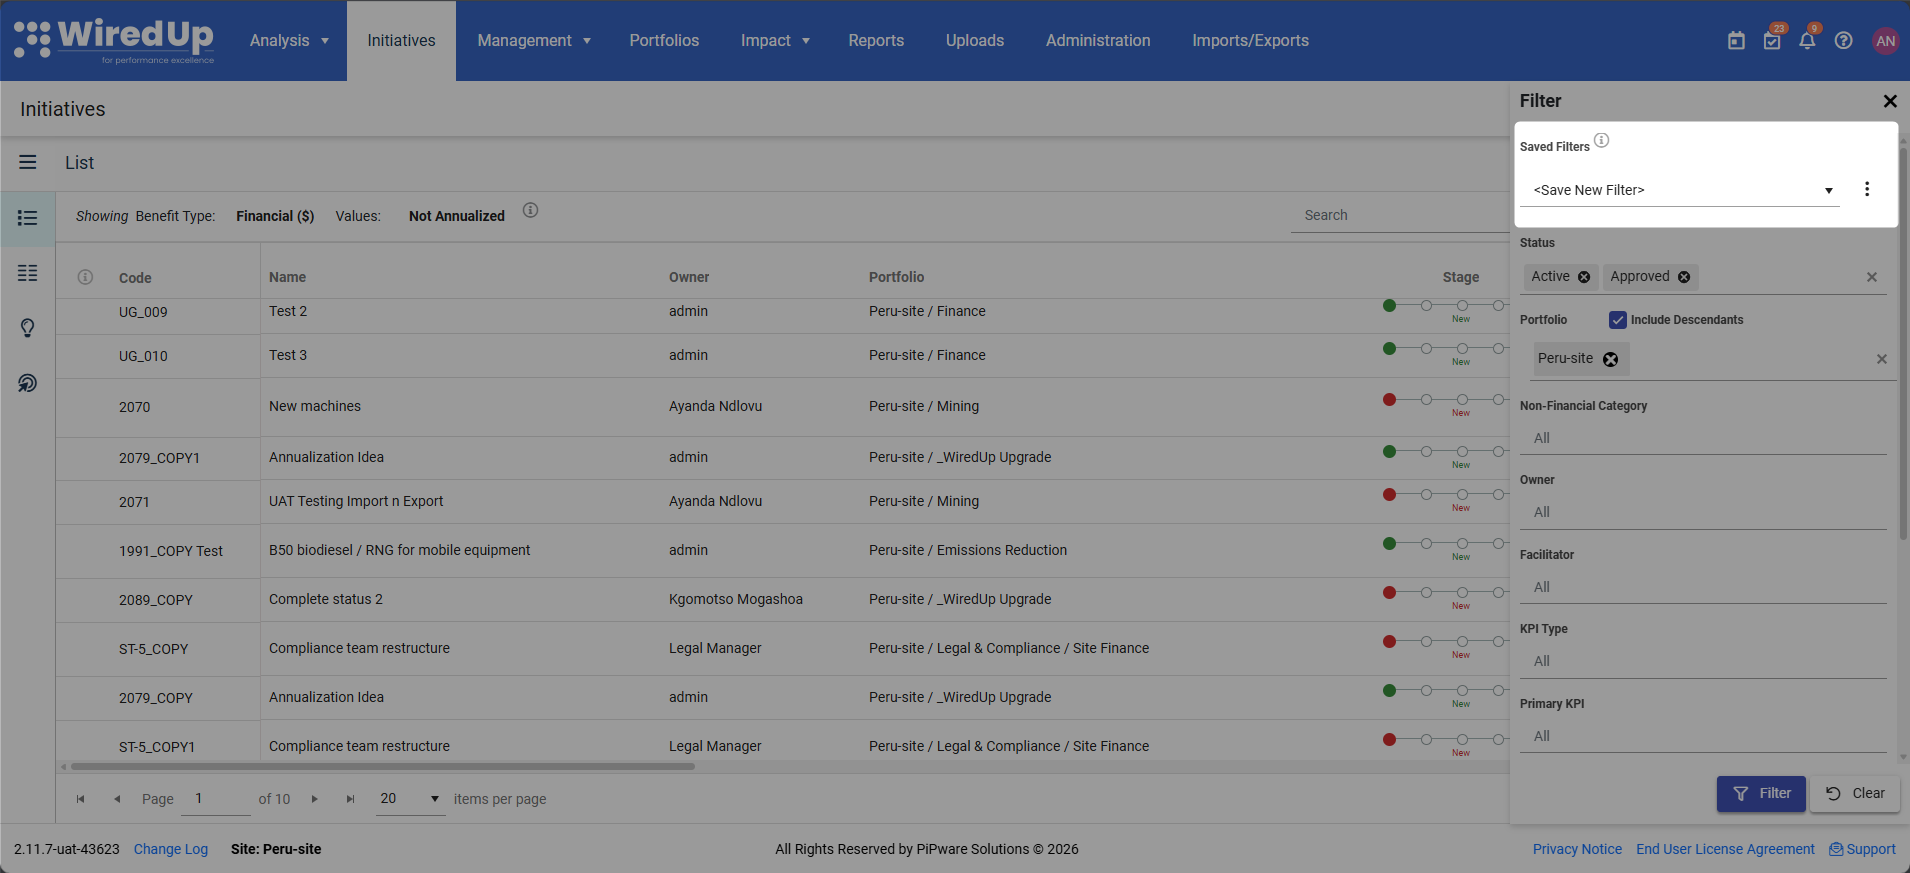
Applying a Saved Filter
To apply a saved filter: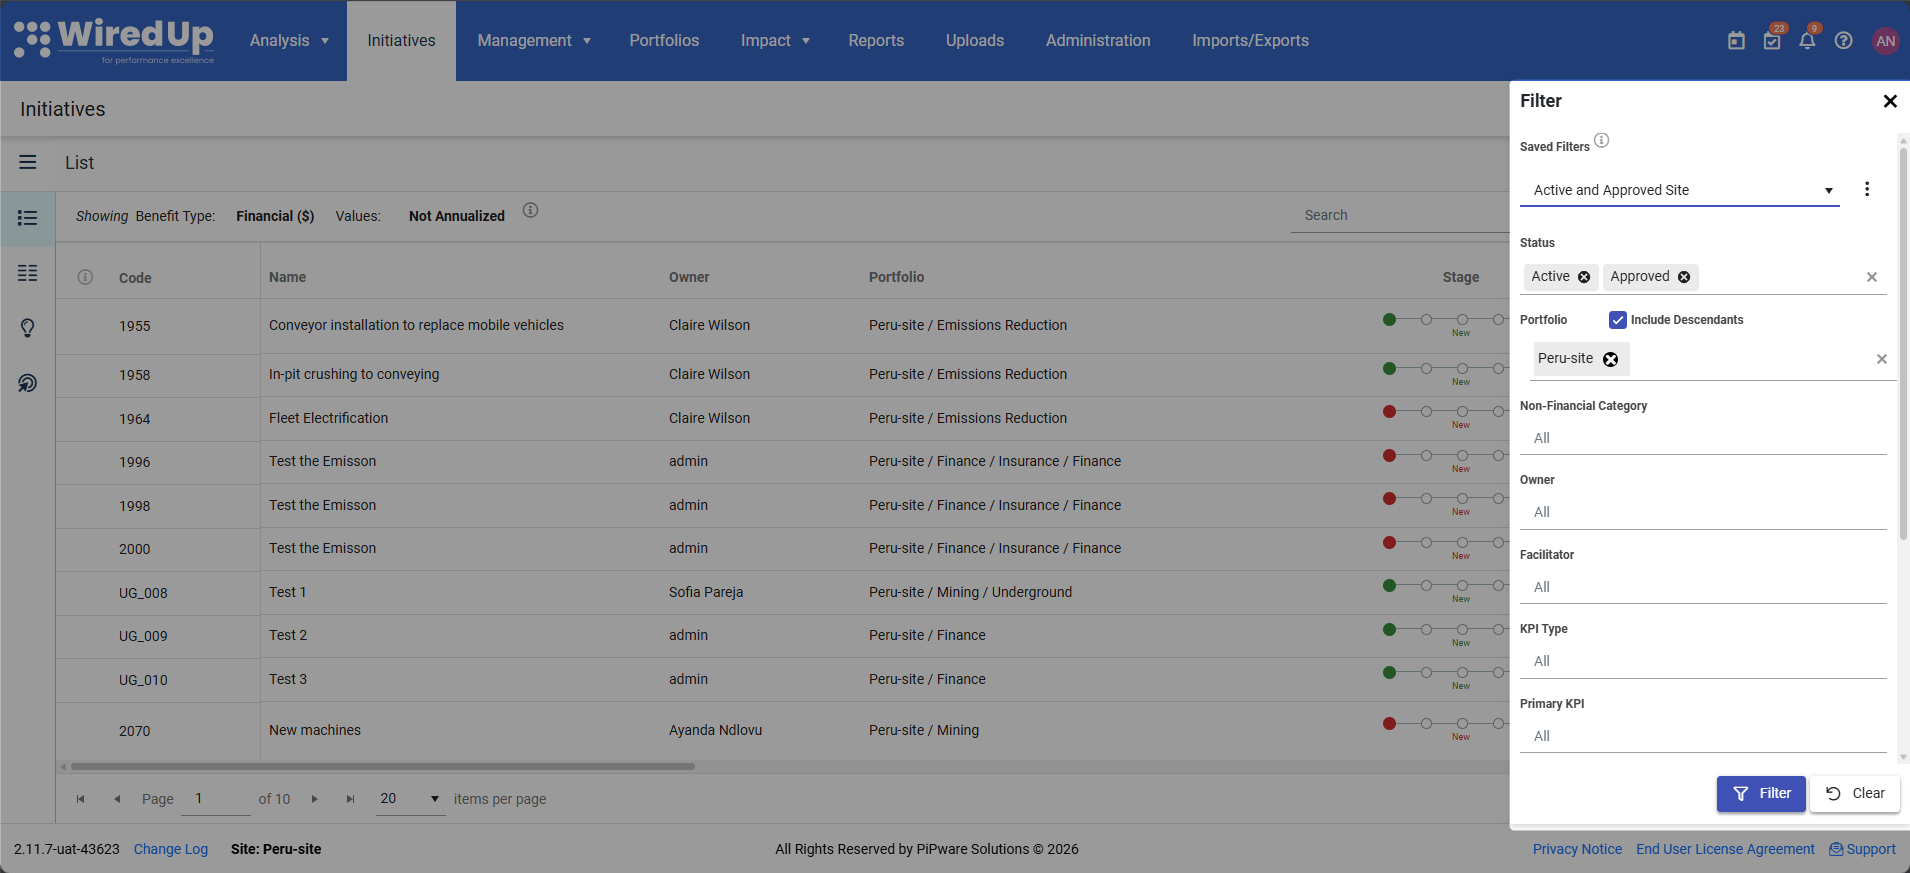
- Click the Filter icon to open the Filter drawer
- Click the Saved Filters dropdown at the top
- Select your desired saved filter from the list
- The filter drawer fields automatically update to match the saved filter configuration
- The contents displayed on the feature updates to reflect the selected filter
Updating an Existing Saved Filter
To update an existing saved filter:
- Select a saved filter from the Saved Filters dropdown
- Modify any filter fields as needed
- The filter name displays with an (Unsaved) suffix to indicate unsaved changes
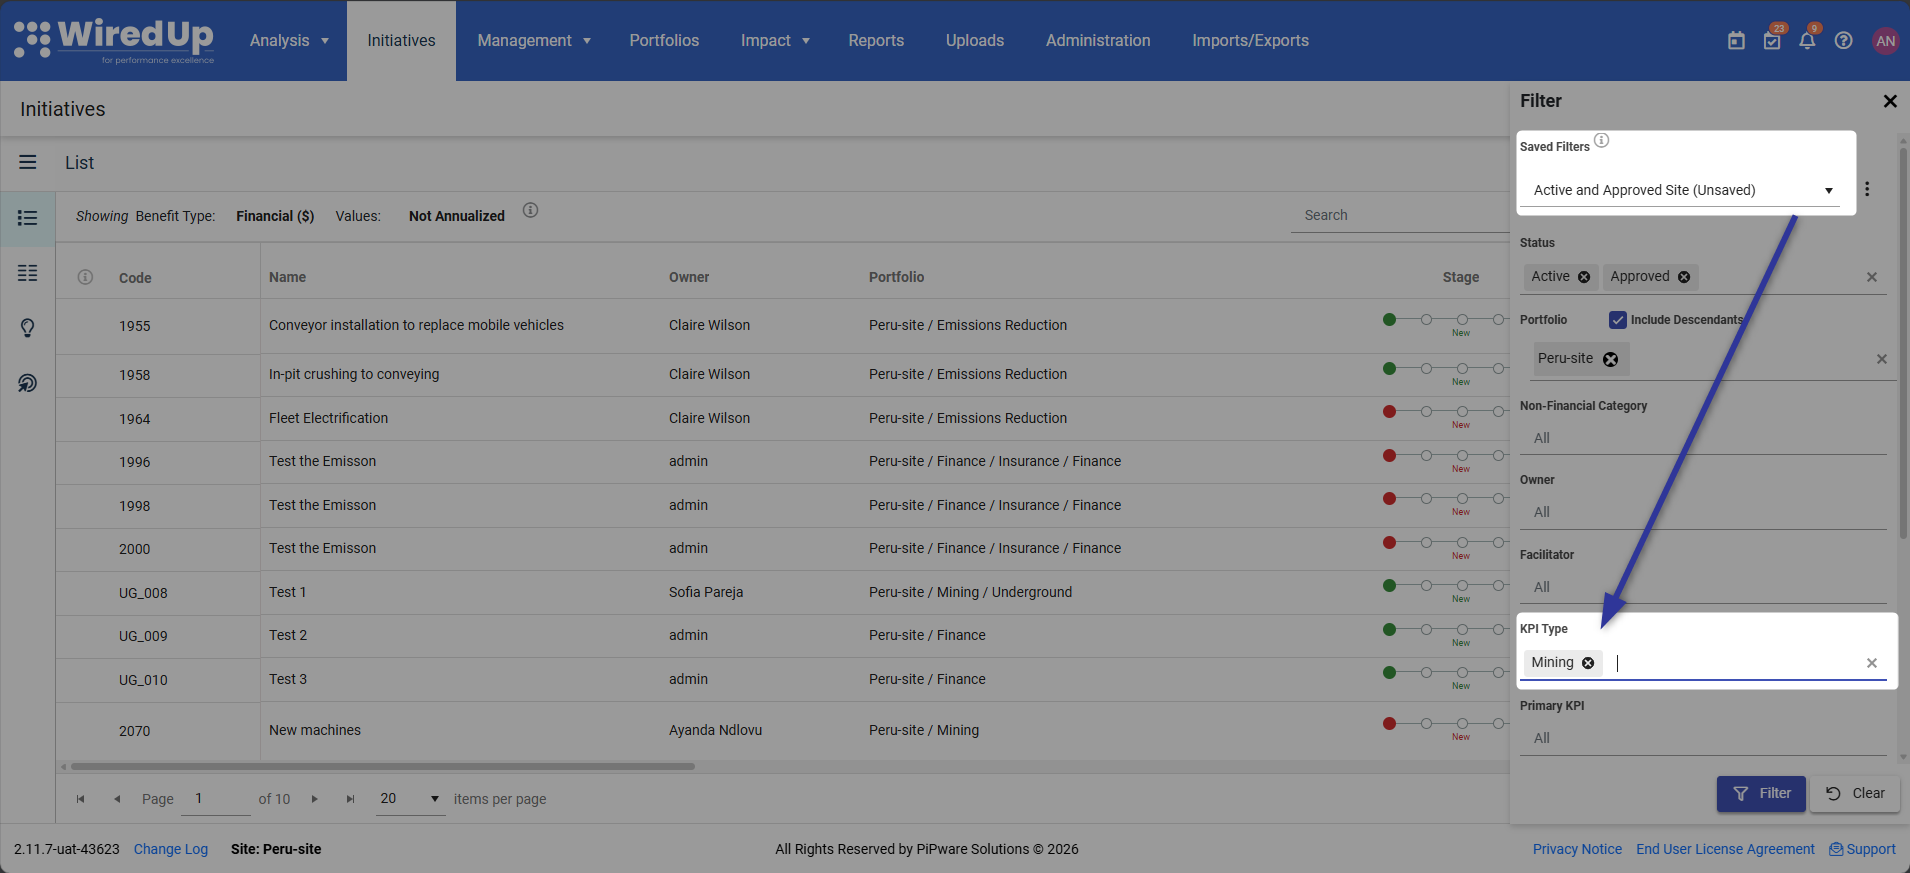
- Click the Filter button at the bottom of the drawer
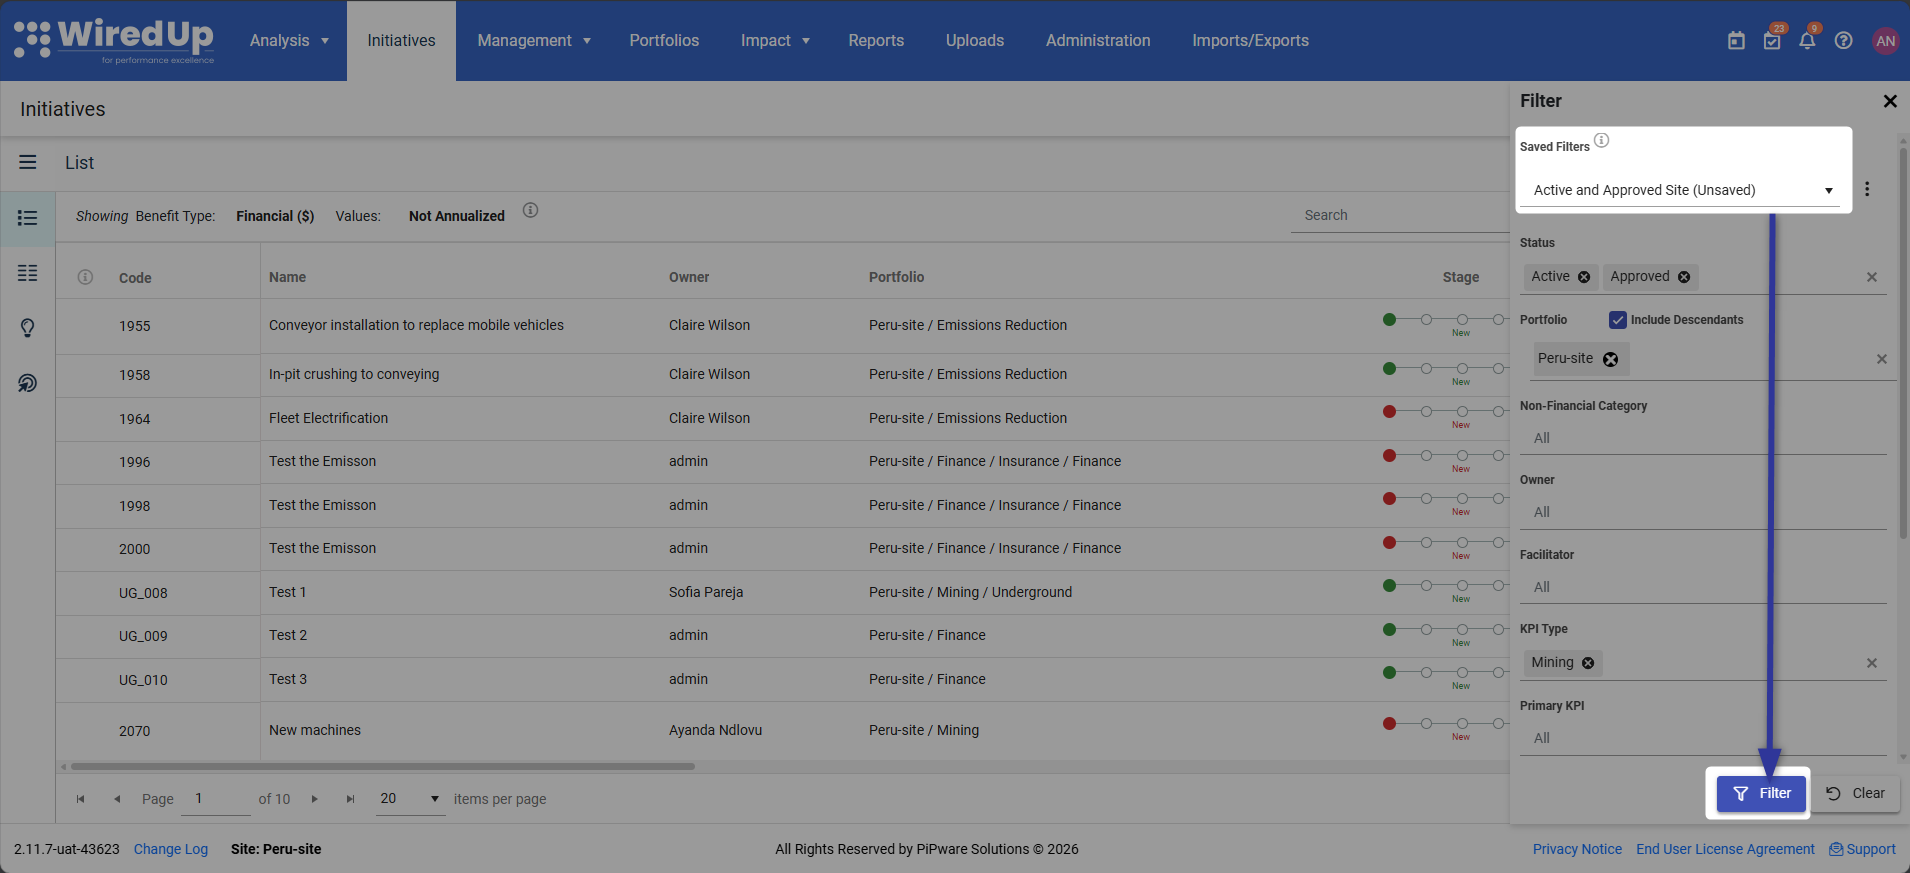
- The existing saved filter is overwritten with the new configuration
Saved Filter Menu Options
Click the ⋯ (vertical ellipse) menu next to the Saved Filters dropdown to access additional options: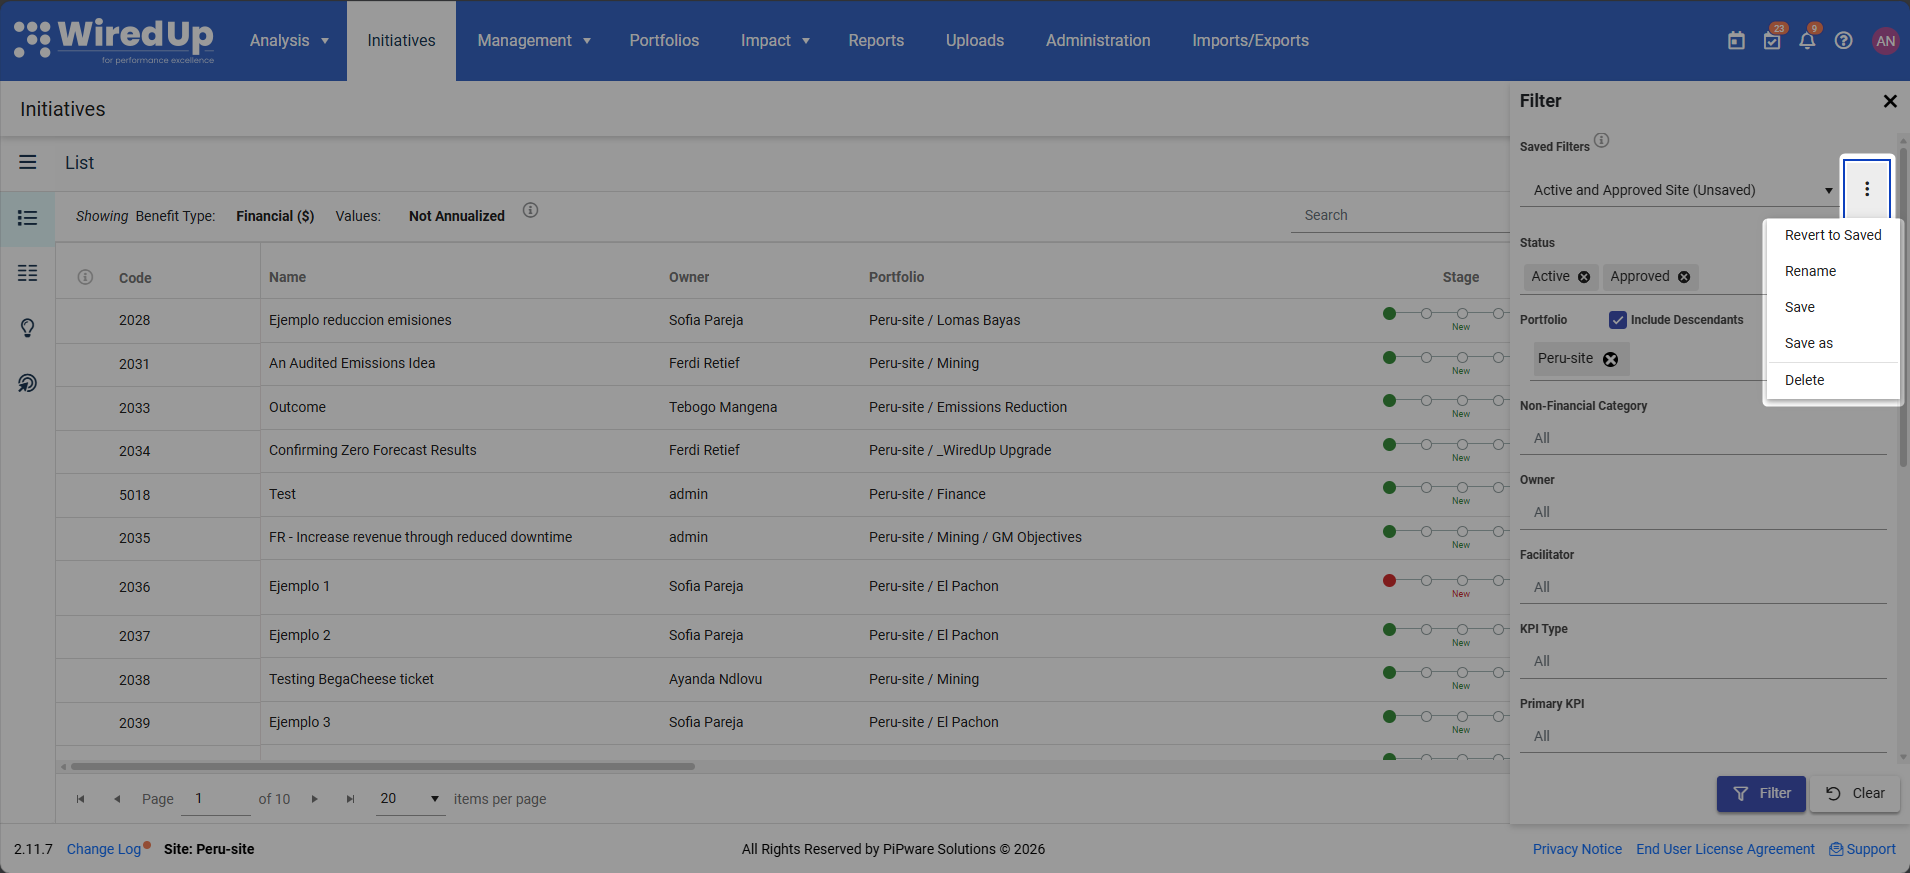
- Revert to Saved: reverts all changes made to the selected saved filter
- Rename: Changes the name of the currently selected saved filter
- Click Rename from the menu
- A rename dialog appears with the current name prefilled
- Save: save the current filter configurations to update the selected saved filter
- Save as: Creates a new saved filter based on the current configuration without overwriting the selected filter
- Click Save As from the menu
- A "Save As" dialog appears requesting a new name
- Delete: Removes the currently selected saved filter
- Click Delete from the menu
- A confirmation dialog appears confirming the removal of the saved filter
Clear Button Behavior
Clicking the Clear button resets all filter fields to the standard unfiltered state:
- The Saved Filters field appears with placeholder as <Save New Filters>

- You can then:
- Click Filter to apply the cleared/unfiltered results
- Click Save As from the menu to create a new saved filter