In This Article
Overview
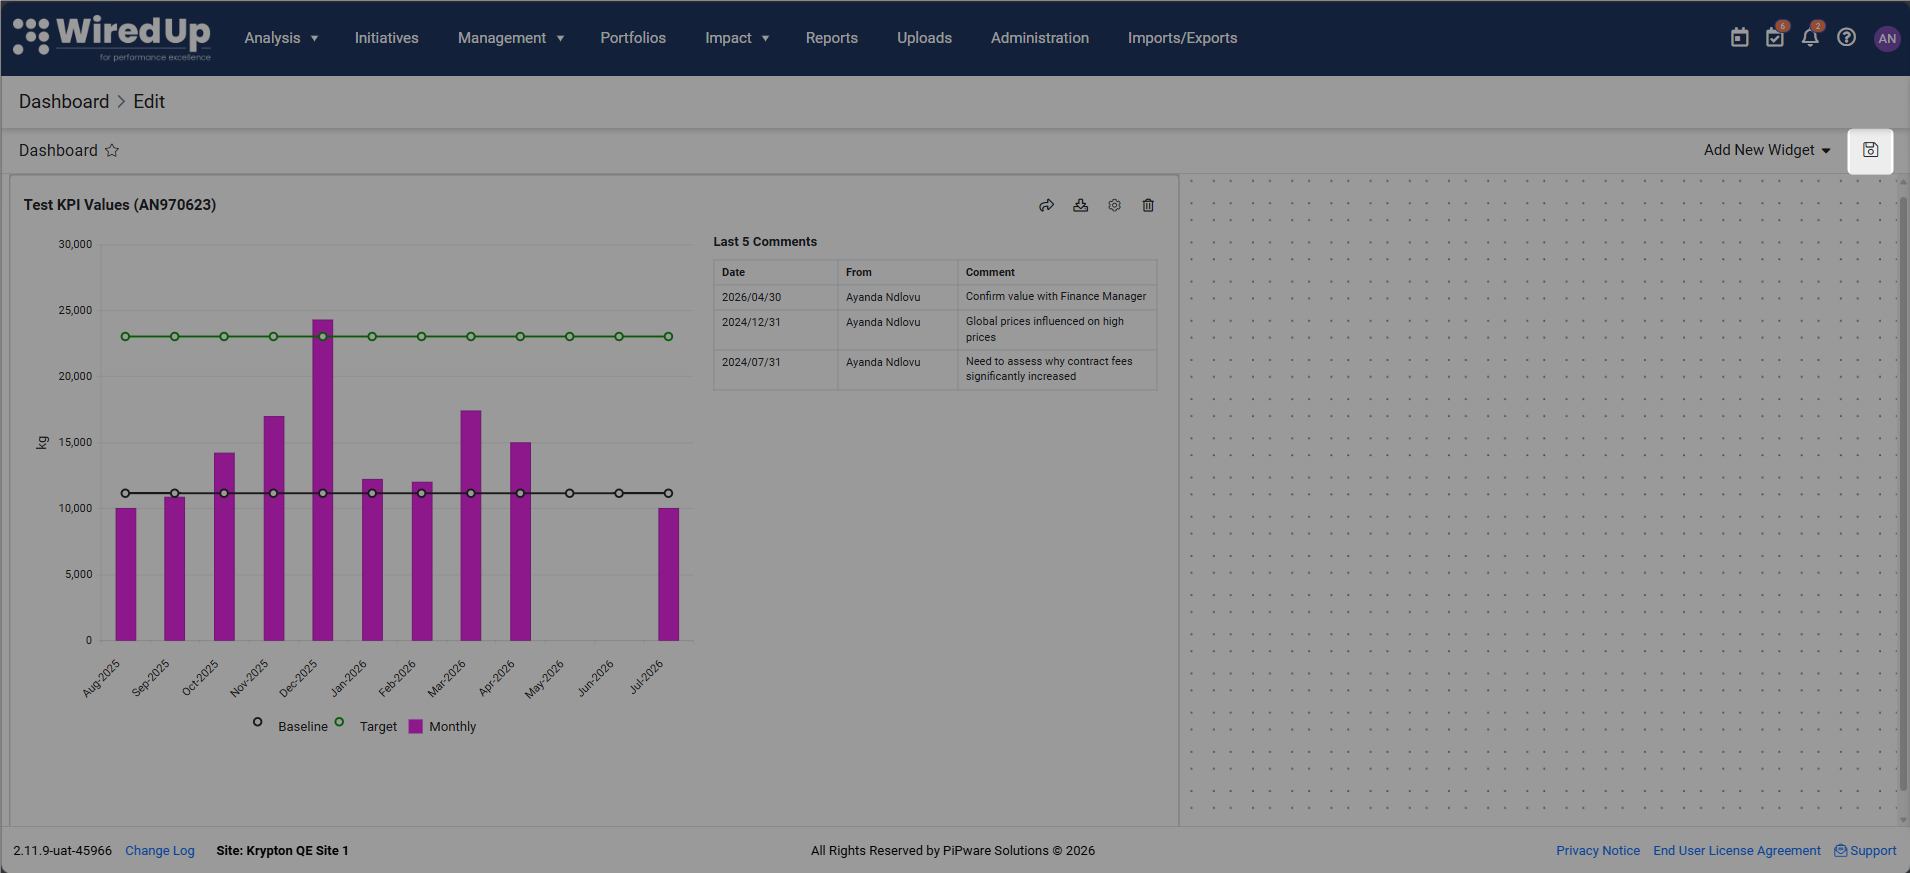
Editing a dashboard in WiredUp allows you to customize your view by adding, removing, or configuring widgets to display the information most relevant to your needs. The dashboard designer provides considerable customization options, giving you access to a variety of widgets such as Activities/Actions, External links, Ideas, Meetings, and more. You must be the owner of a dashboard to edit it. Once in edit mode, the page view changes to a snap-to-grid layout where you can add new widgets, customize existing ones, and arrange them to create your ideal dashboard layout.
Entering Edit Mode
Note: You must be the dashboard owner to edit a dashboard
Note: You must be the dashboard owner to edit a dashboard.
- Navigate to the dashboard you want to edit
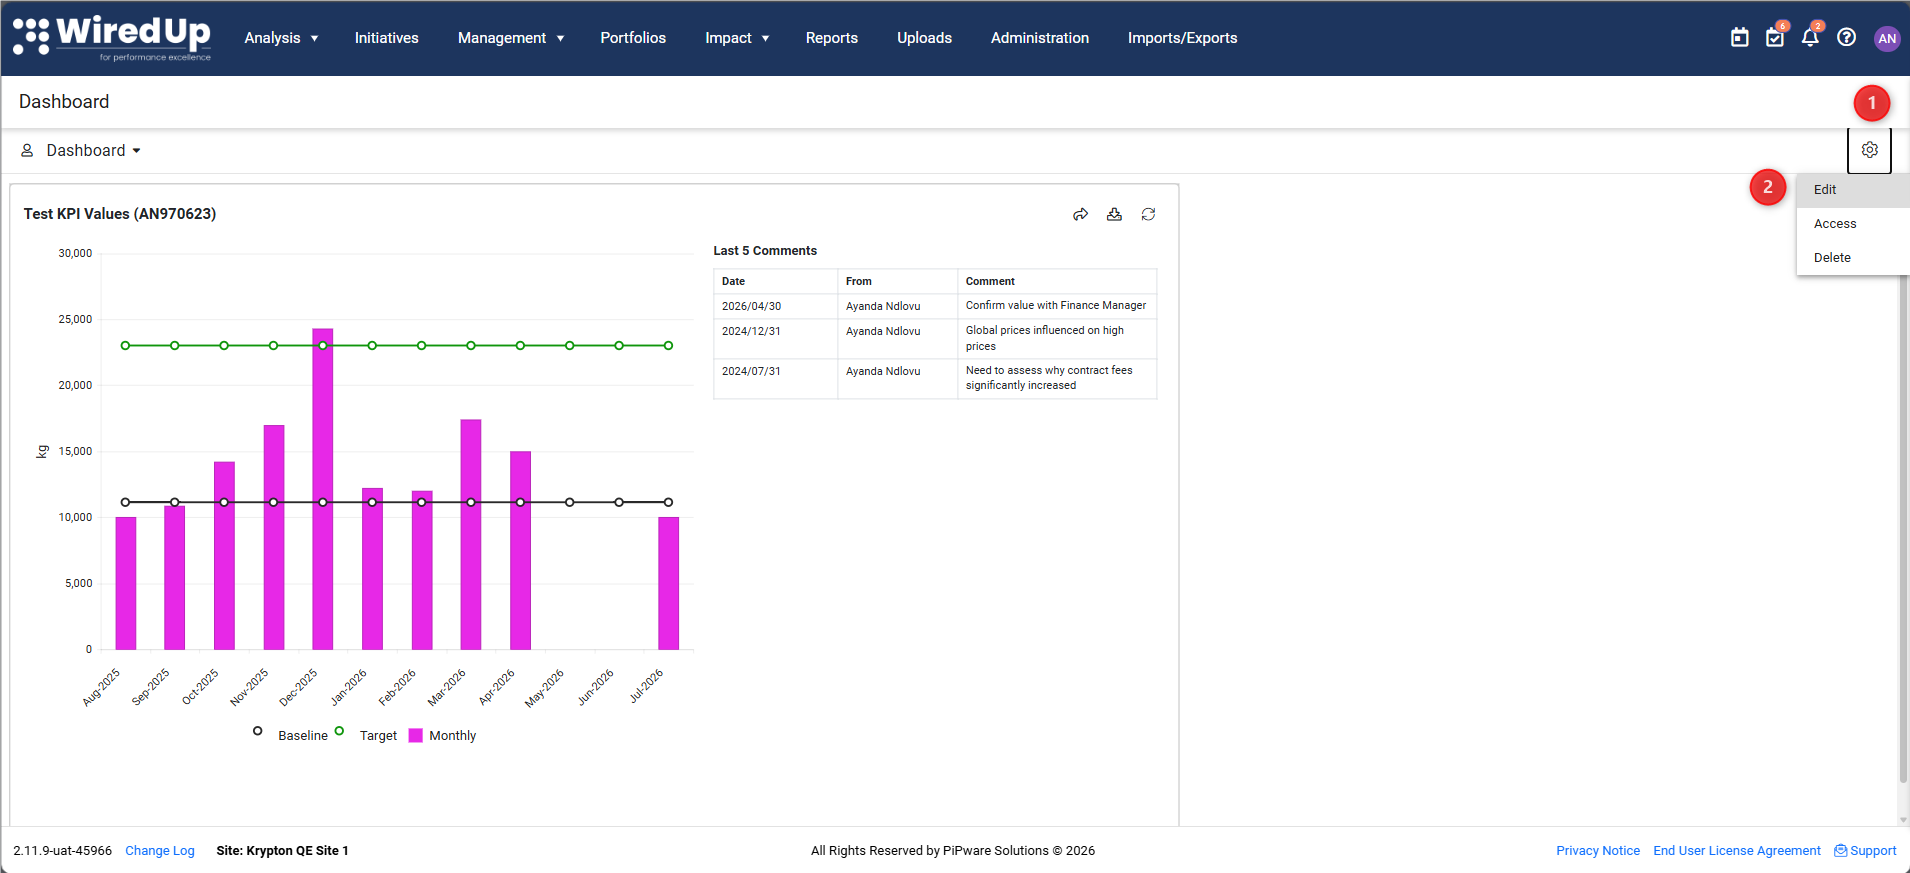
- Locate and click the gear icon (cog) near the top right of the screen
- Select Edit from the menu
- The page view will change to a snap-to-grid layout where you can add, edit or remove widgets
Adding Widgets
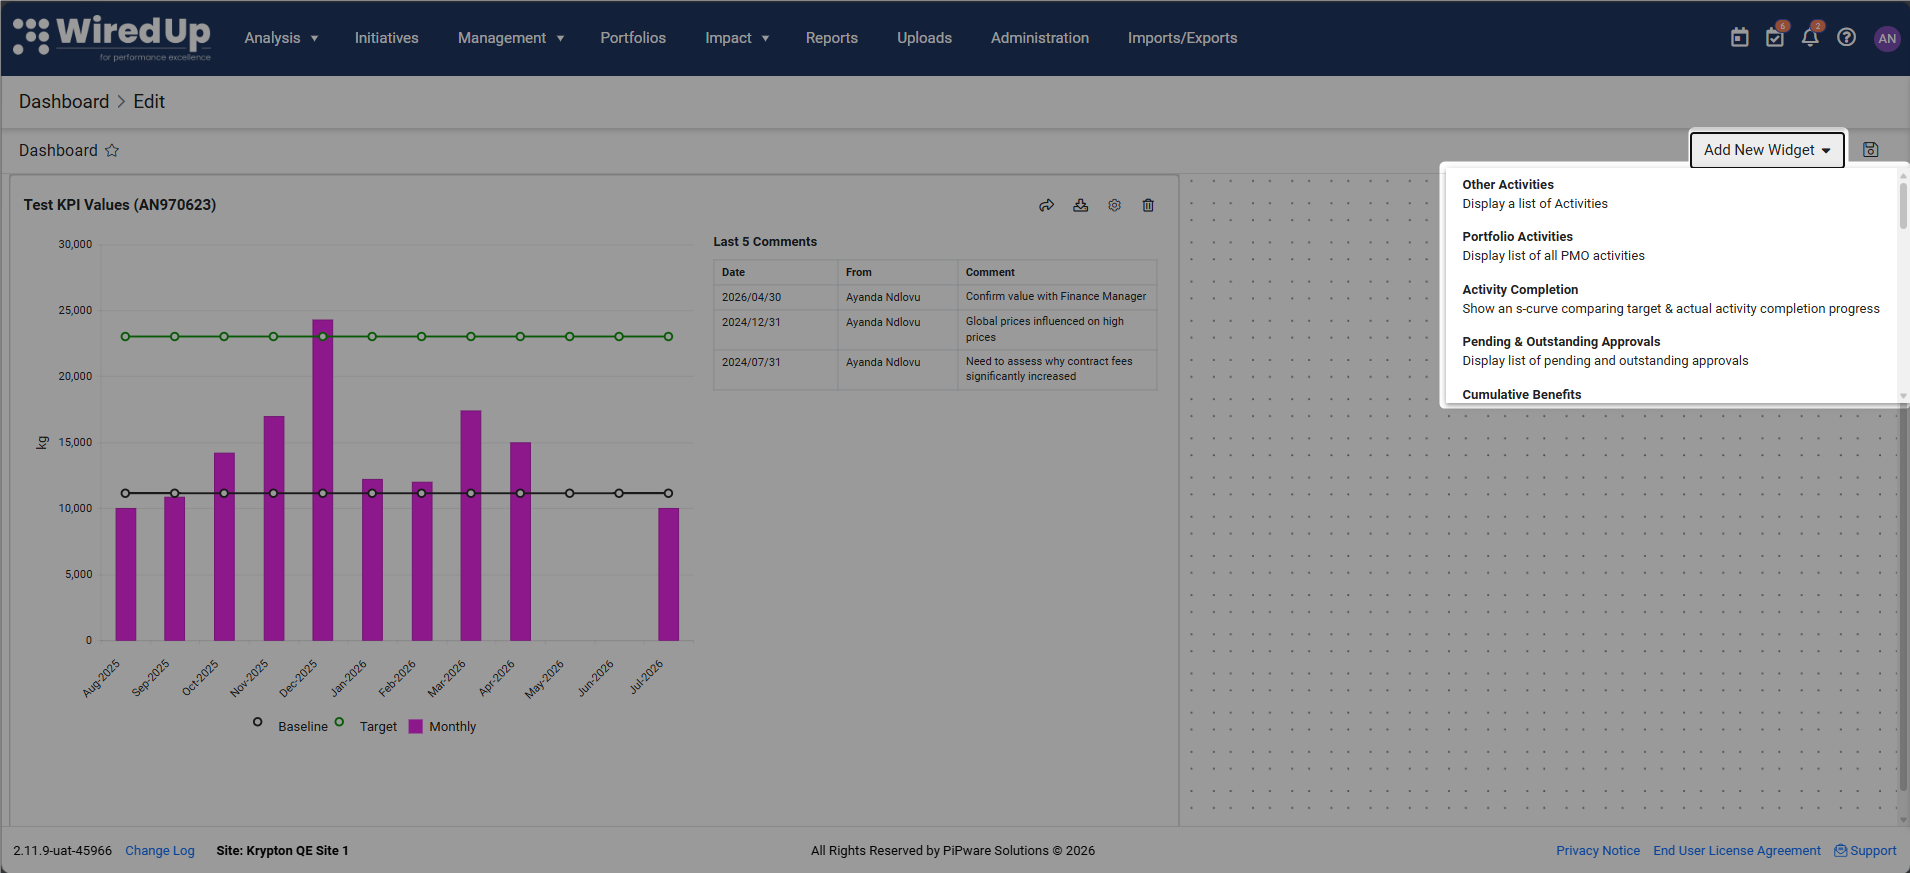
- While in edit mode, you can add new widgets to your dashboard using the Add New Widget button
- Click the drop-down arrow to see the available widgets to add to your dashboard
- For detailed instructions on adding widgets, refer to the Creating a New Dashboard article
Editing Widget Settings
- Locate and click the options cog icon on the top right of the widget you want to customize

- Configure the widget settings as needed. Click Save on the widget to apply the changes. For more information on editing widgets, please see this article: Available Widgets
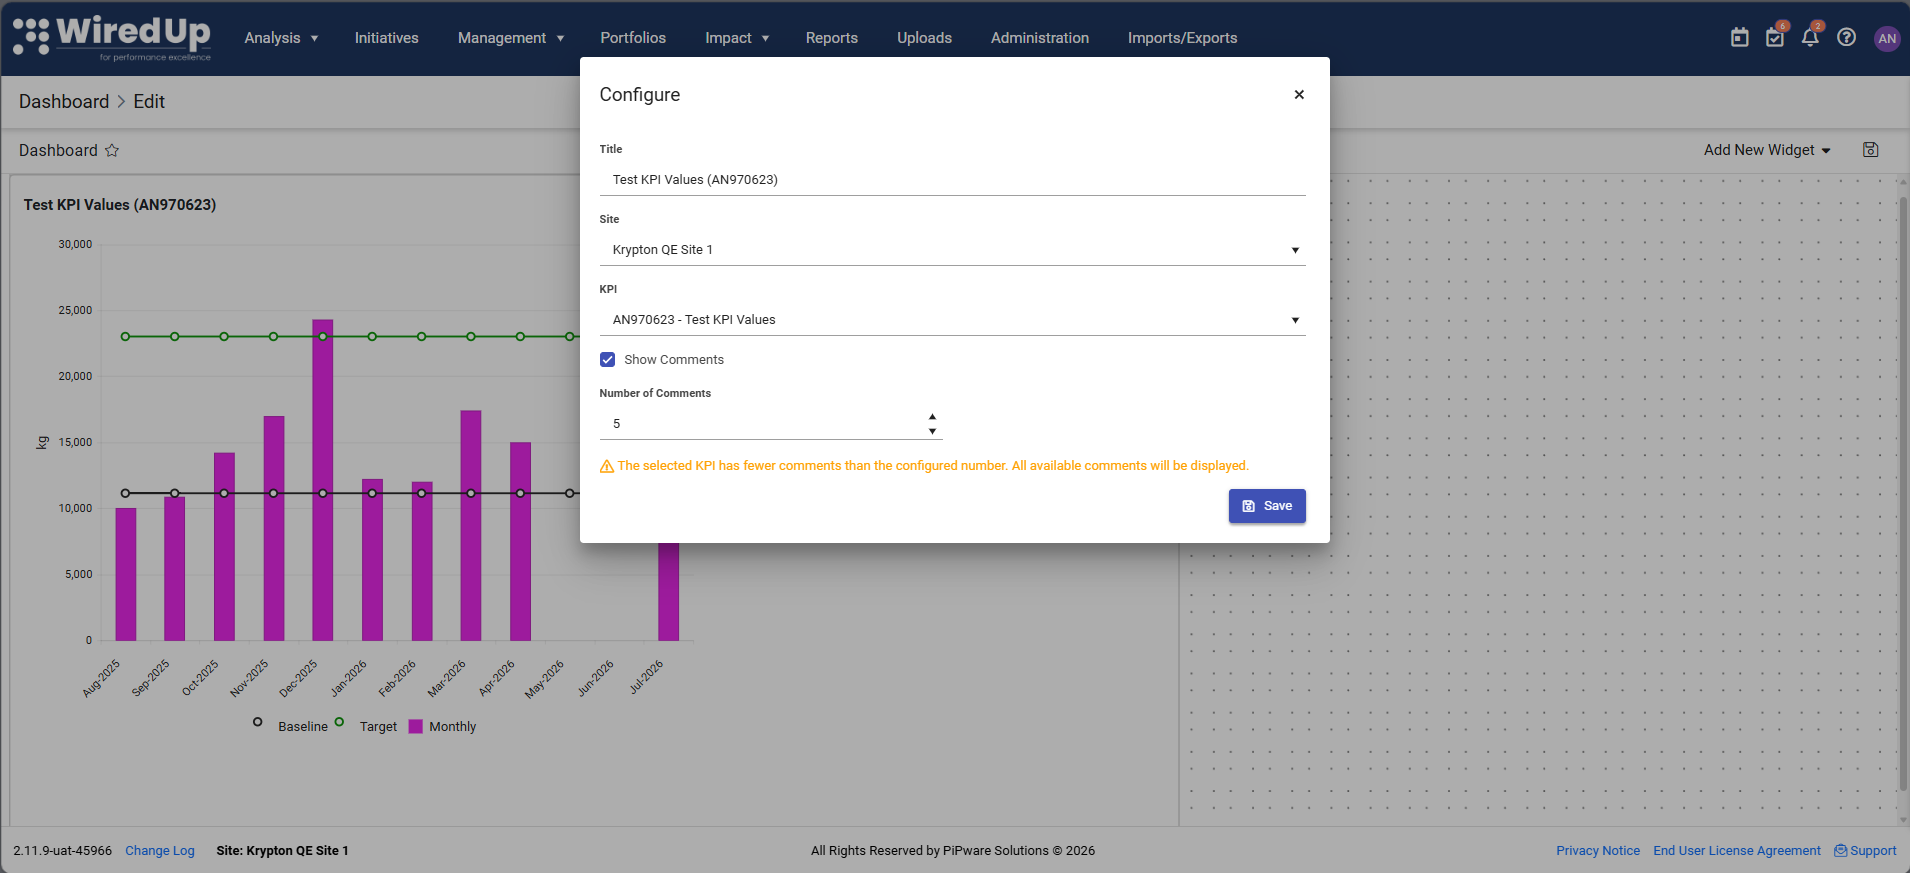
Note: If no selection criteria are set, the widget will display default data
Removing Widgets
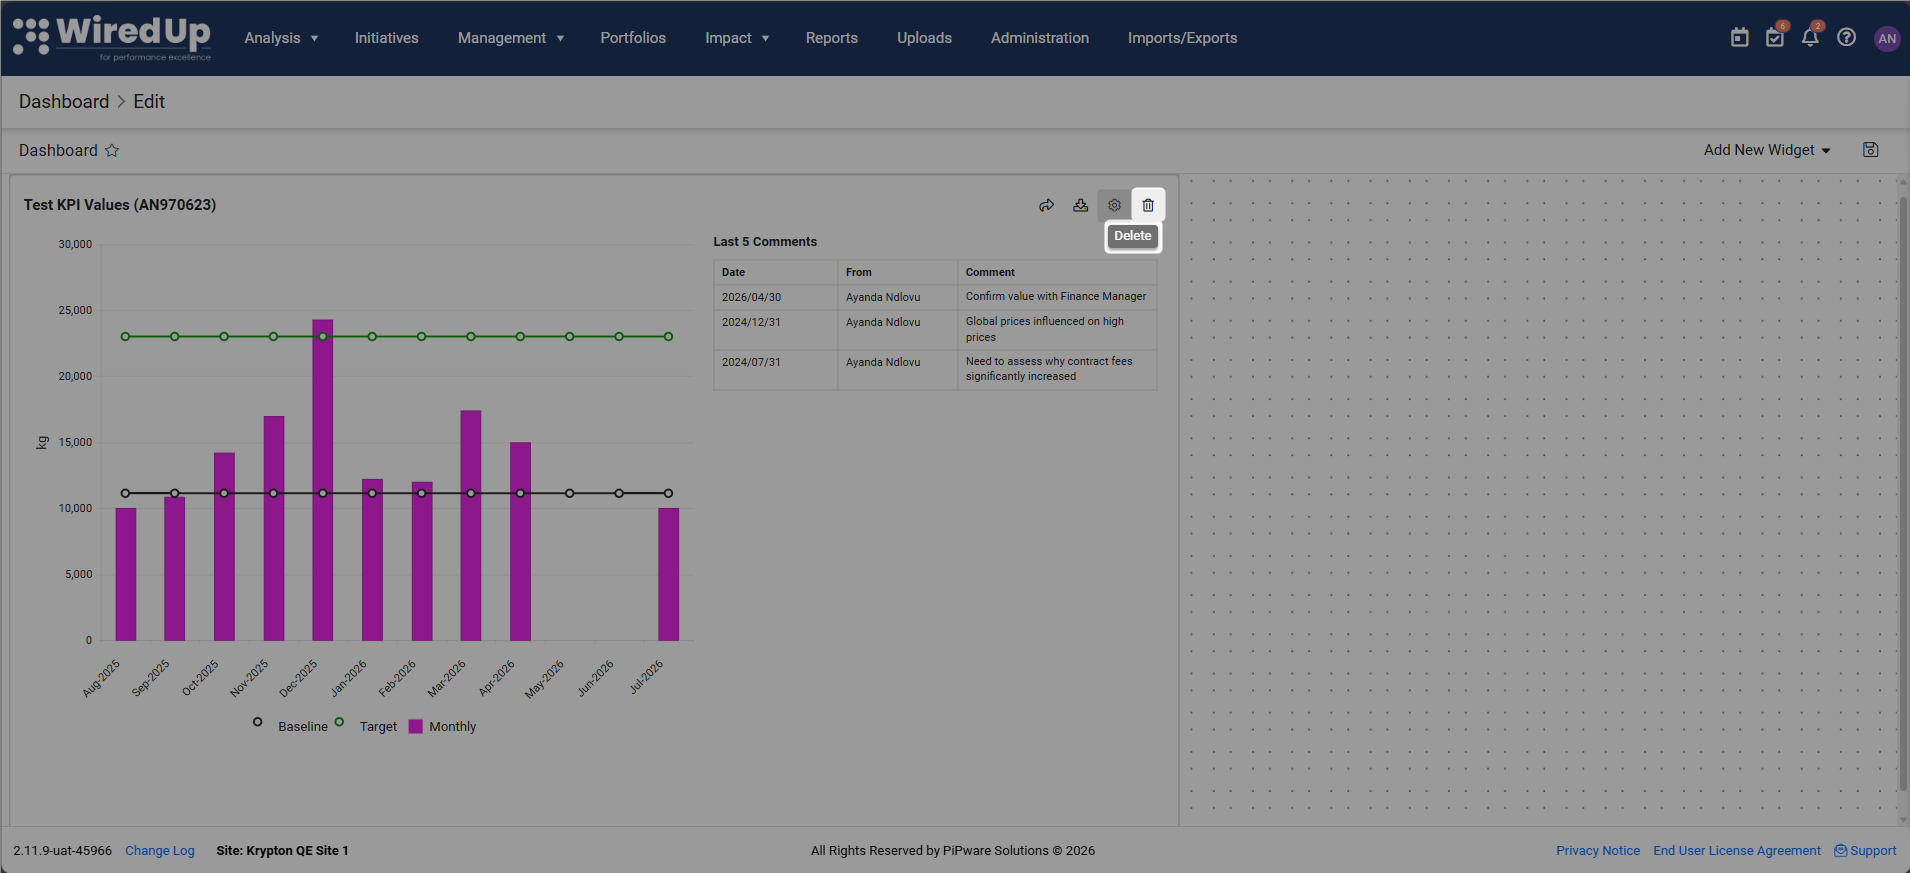
To remove a widget from the dashboard, click on the Delete icon displayed on the widget card
Arranging Widgets
In edit mode, widgets can be dragged and repositioned on the snap-to-grid layout
- Click and hold a widget to drag it to a new position
- Release to place the widget in the new location
- Resize widgets as needed to optimize your dashboard layout
Saving Your Changes
After making any edits, click the Save button on the top right of the screen
Note: Changes are not auto-saved. Ensure you save your dashboard before exiting edit mode
Managing Dashboard Settings
While in the dashboard settings menu (gear icon), you can also:
Access
- Switch the dashboard's visibility between public and private
- Public: dashboard will be accessible to all system users
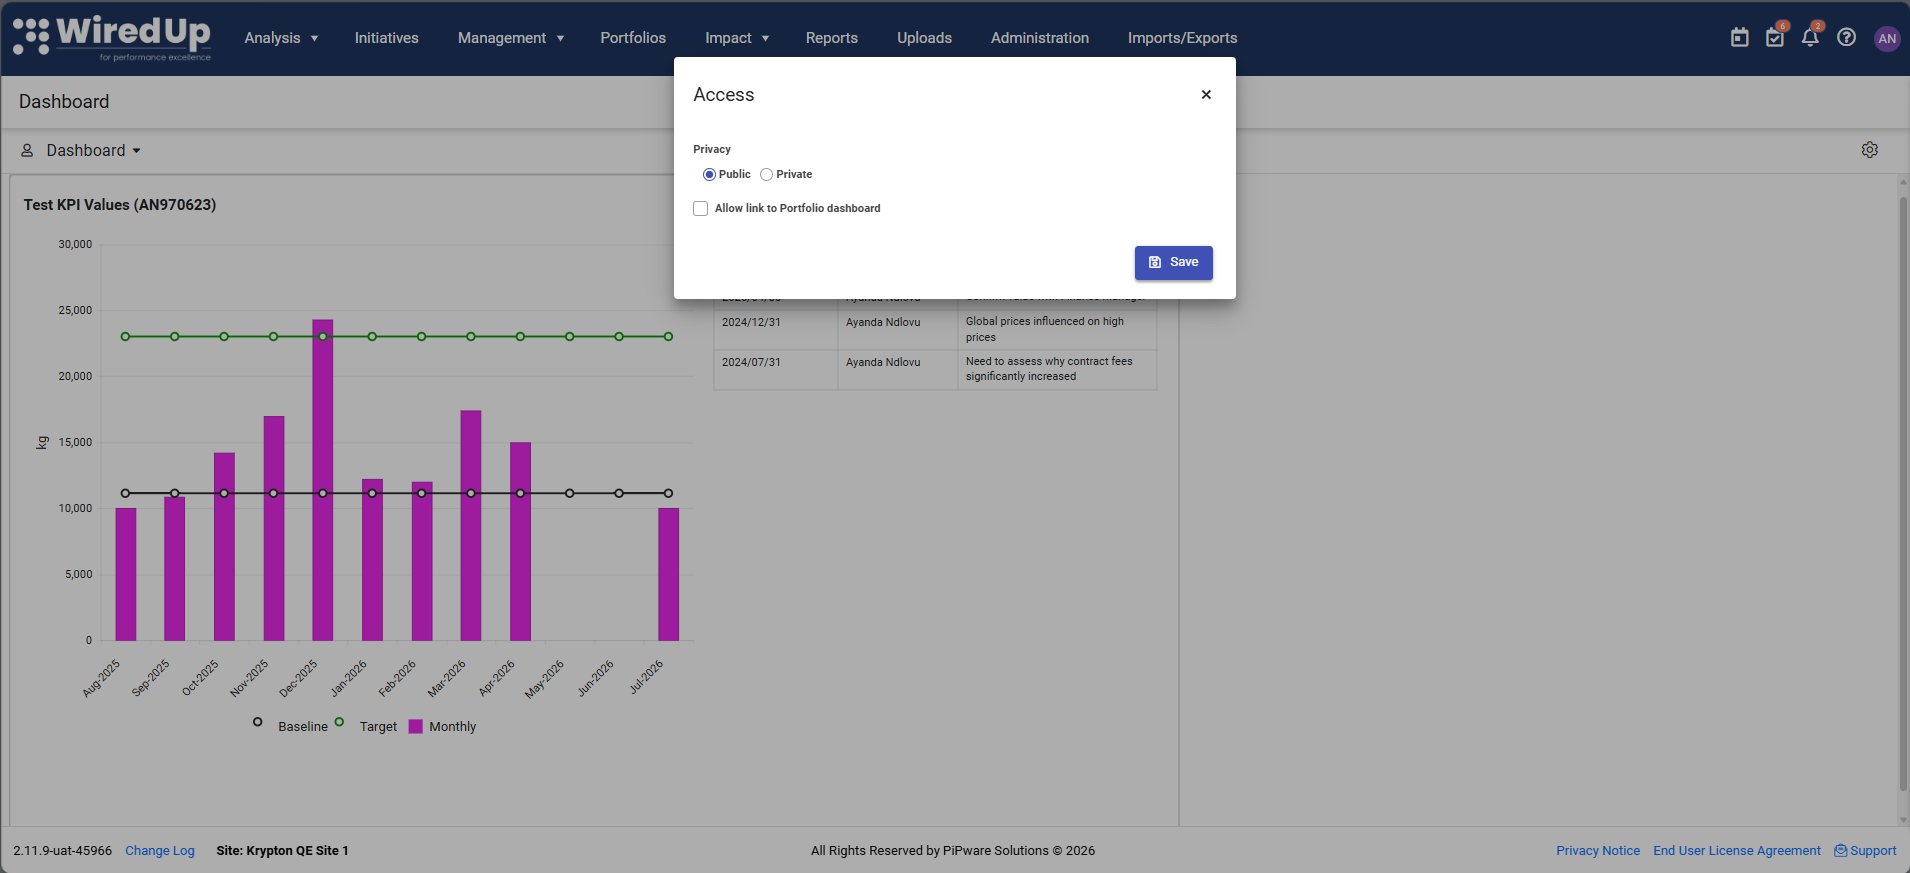
- Private: dashboard access will be accessible by specific users or roles specified
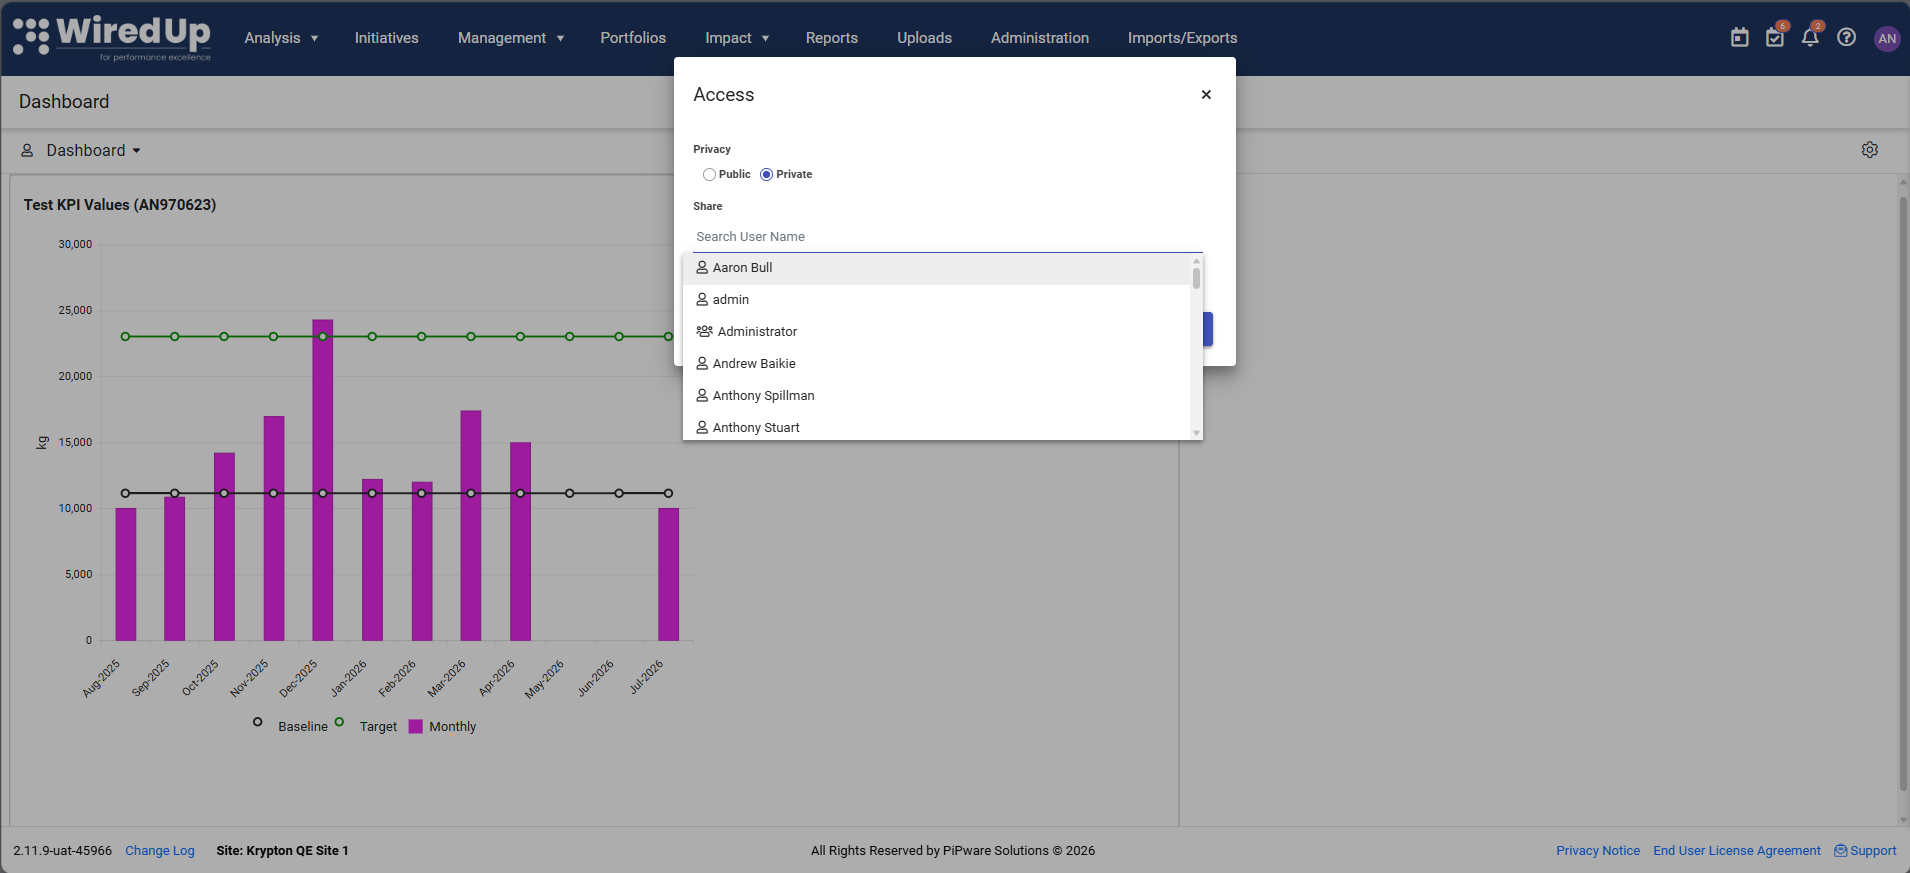
- Public: dashboard will be accessible to all system users
- Both Public and Private dashboards can be linked to a specific portfolio level, which applies default portfolio filtering to all widgets.
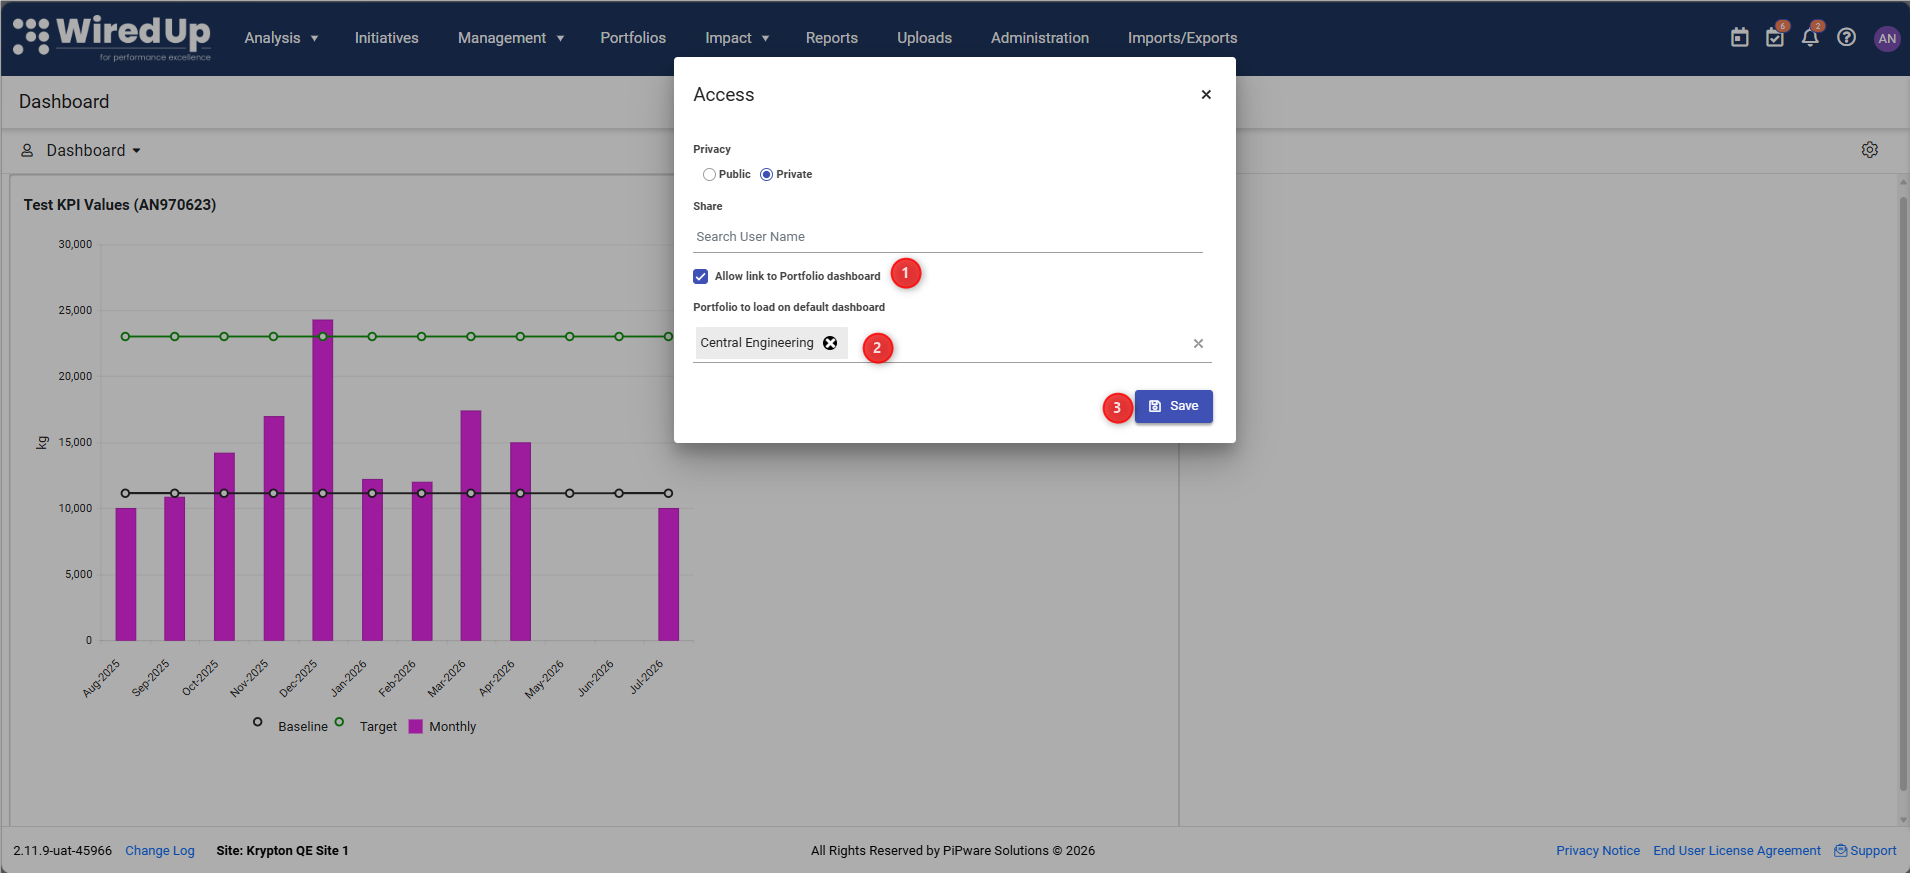
- In the Access dialogue, locate the Allow link to Portfolio dashboard option and select the checkbox
- The Portfolio to load on default dashboard section will appear. Browse and select the portfolio you want to link to the dashboard
- Once selected, click Save to apply the portfolio link
- All widgets on the dashboard will now be filtered based on the selected portfolio by default
Delete
Use the Delete icon to remove the dashboard entirely. Note that this action cannot be undone.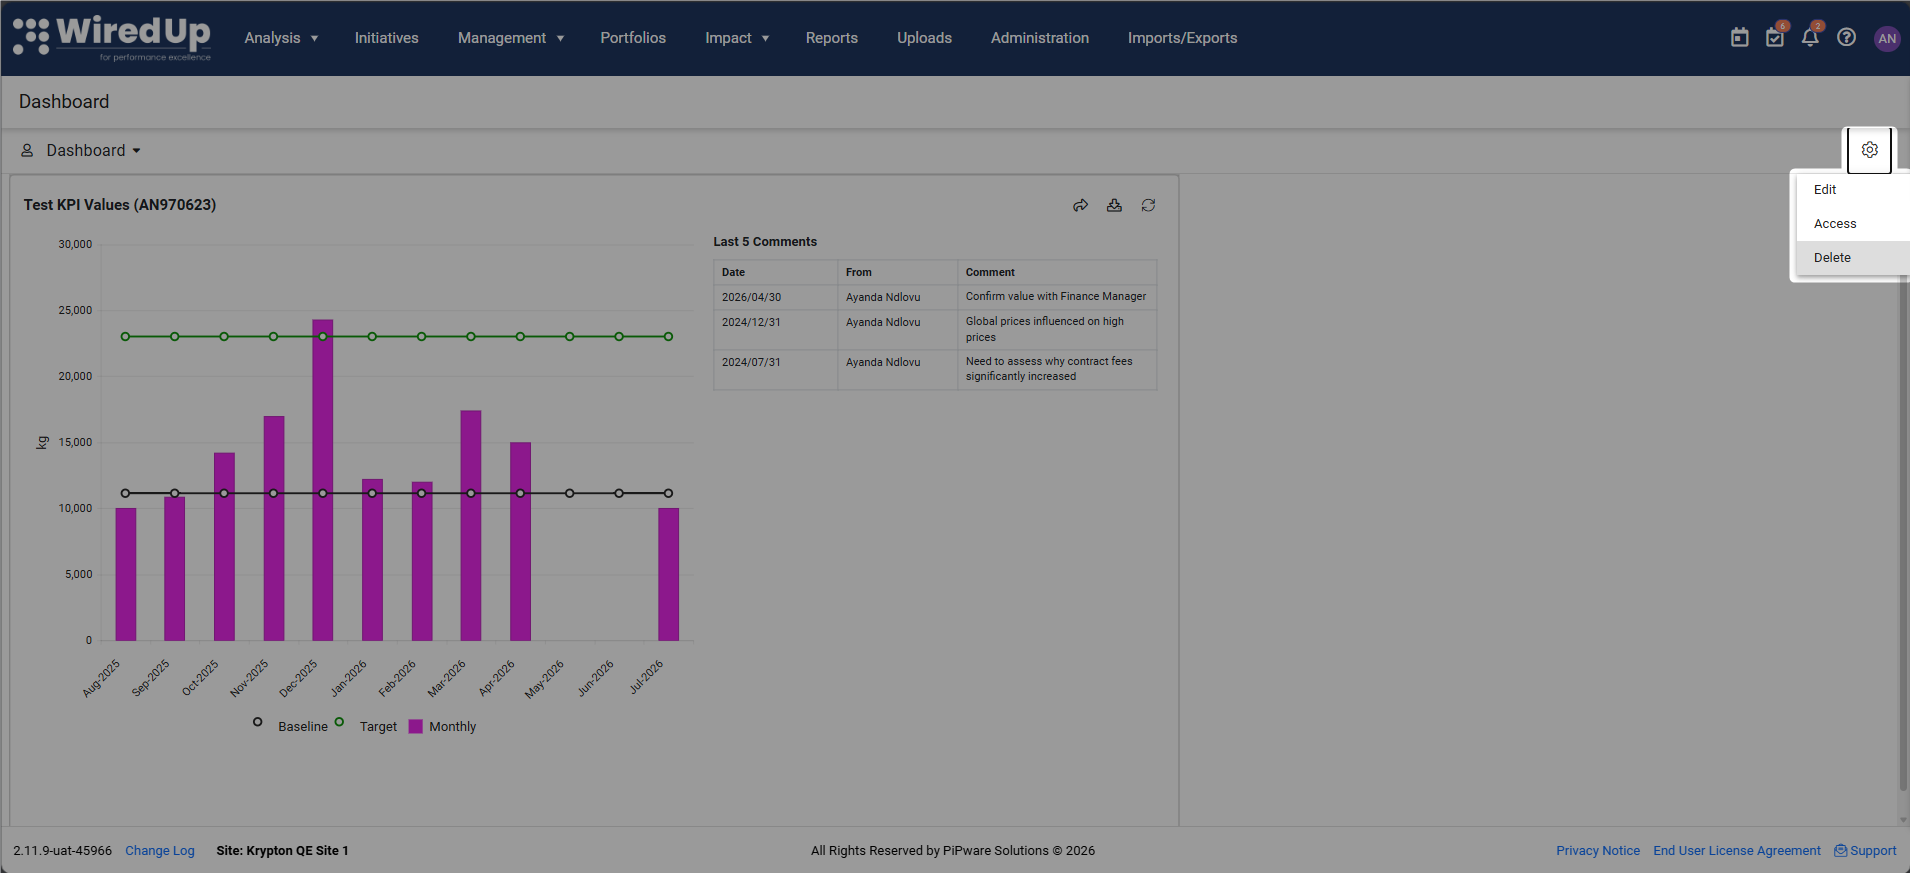
Recommendations
- Save your changes to avoid losing work
- Test widget filters and settings to ensure they display the desired information
- Use descriptive widget configurations to make your dashboard more meaningful
- Arrange widgets in a logical flow that matches your workflow
- Remove unused widgets to keep your dashboard clean and focused
- Consider the audience when editing shared dashboards - ensure the information is useful to all viewers
- Remember that only dashboard owners can edit - if you need to modify someone else's dashboard, consider copying it first
Next Steps
For more information on how to set a Default Dashboard, please see the following article: Setting a Default Dashboard